

Newer Samsung Galaxy phones have a "temp sensor", which is really a thermistor, on the back wireless coil/NFC.
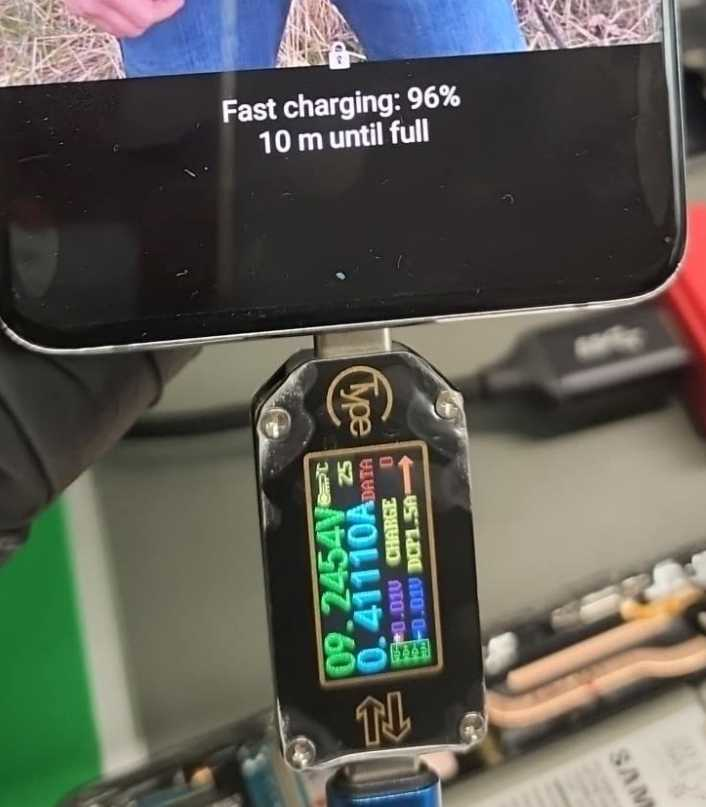
If you don't have this plugged in, the phone will not charge & give a ⚠ temp warning symbol.
In this case, I had no extra wireless coil to test with.
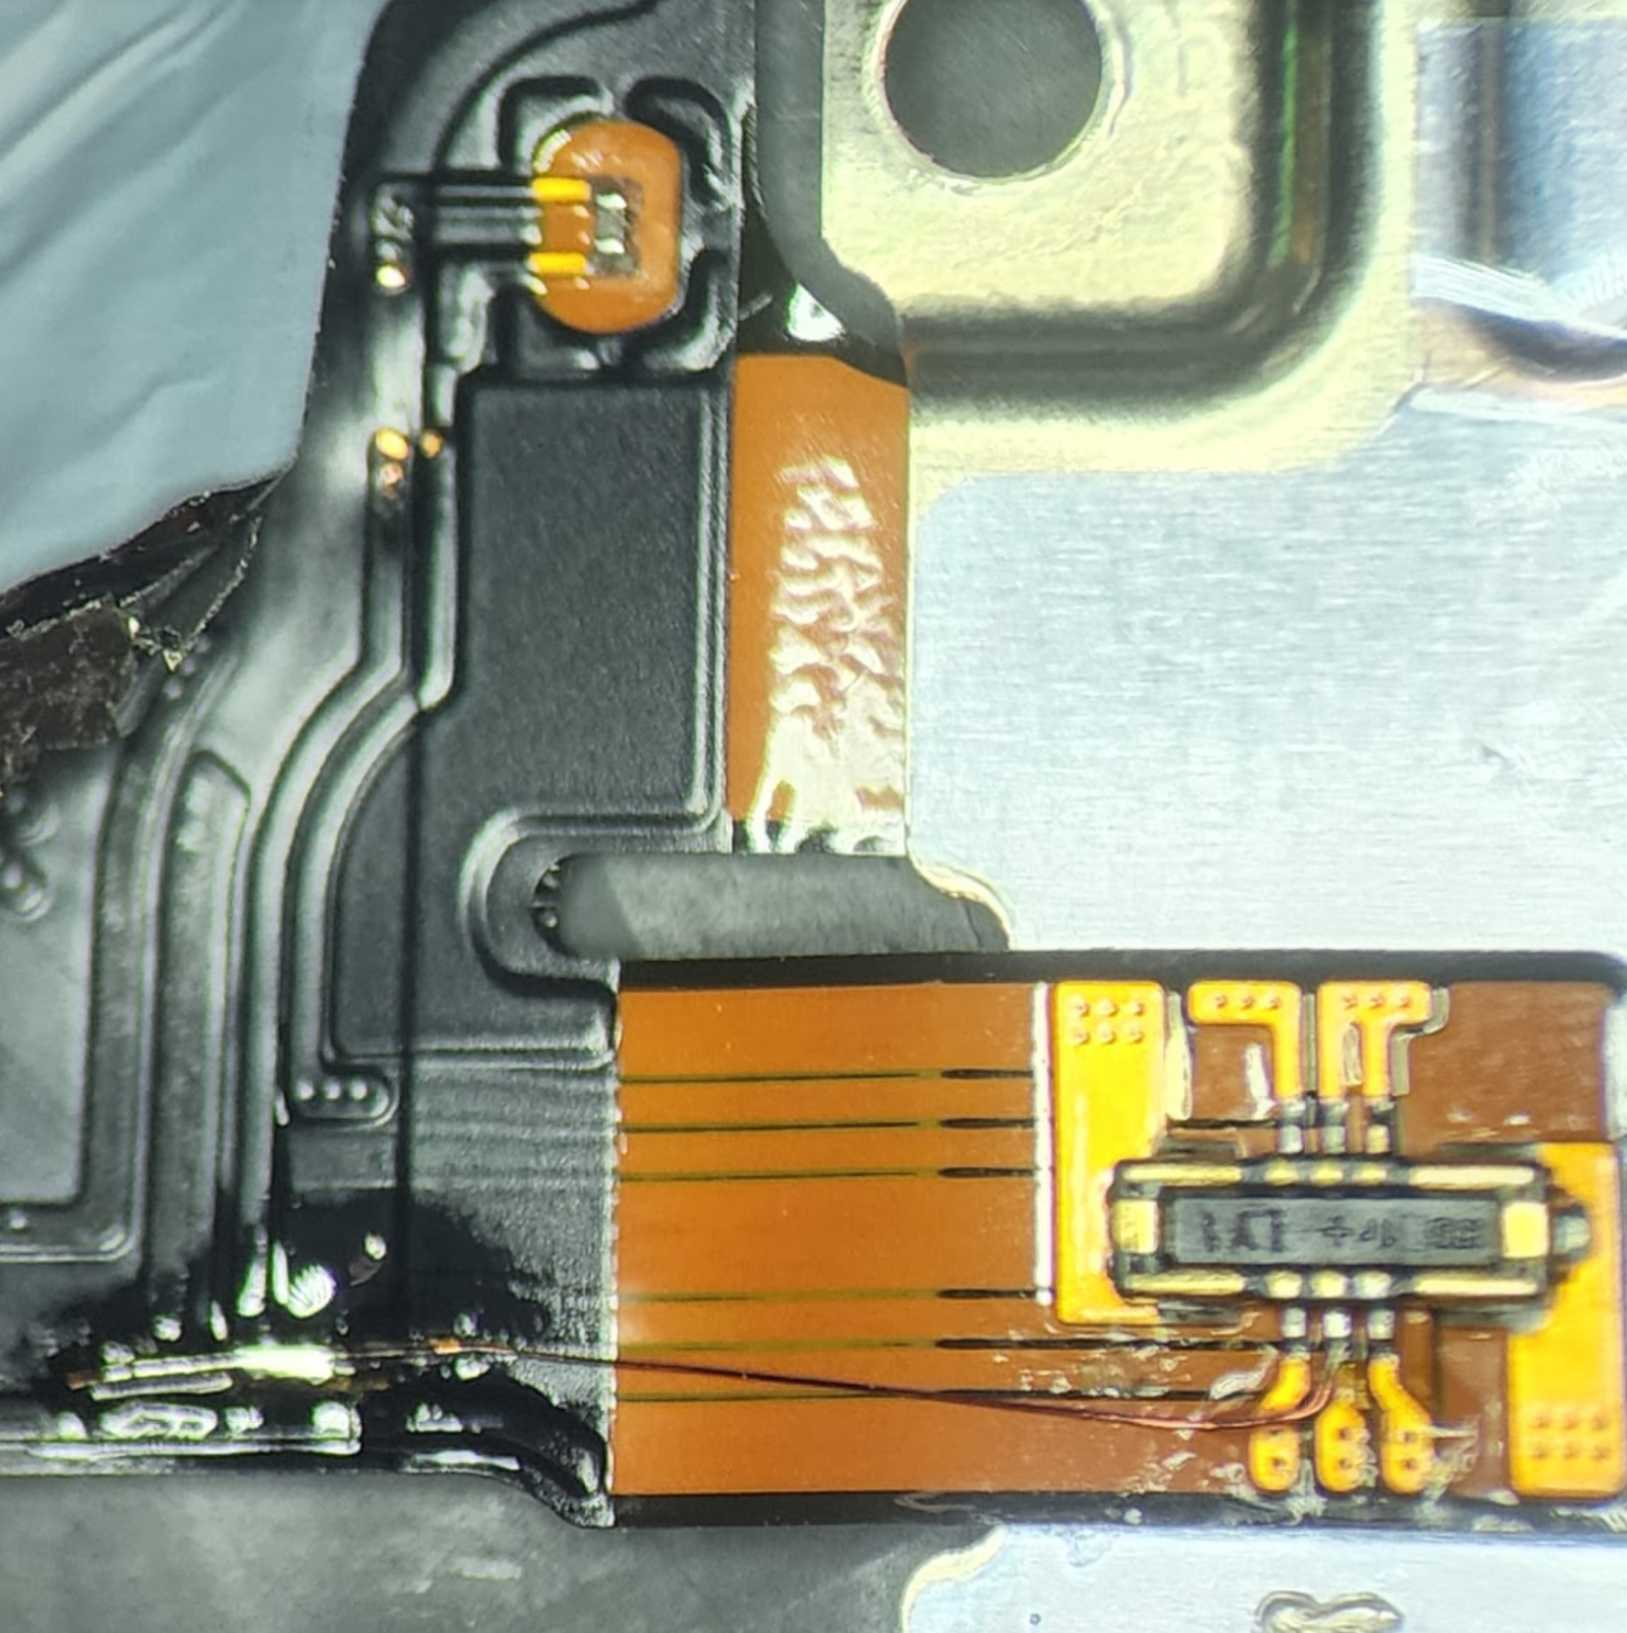
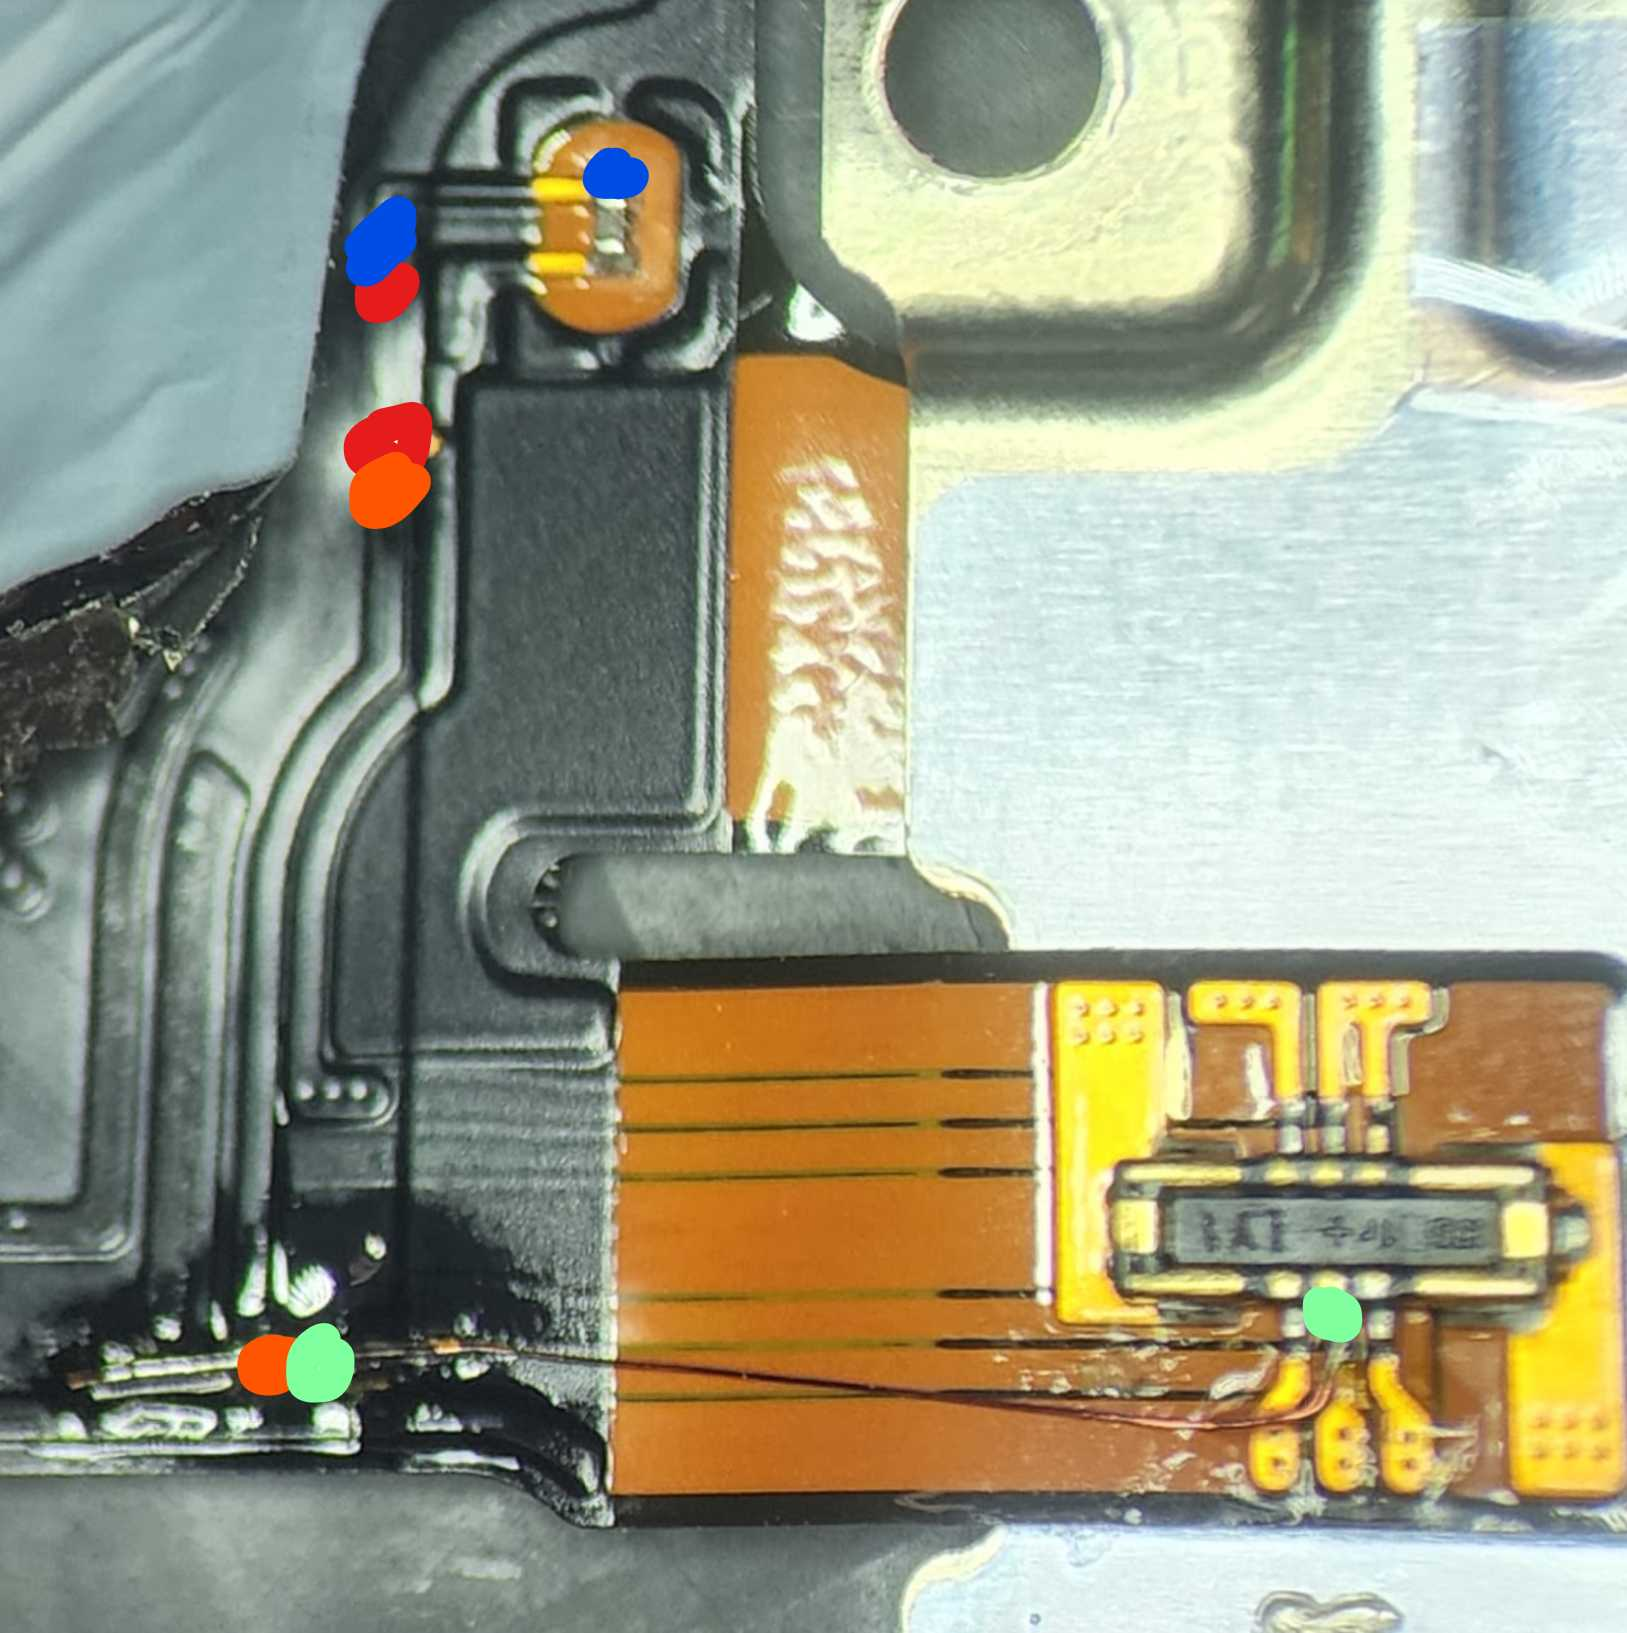
Looking through the part, I spotted the component. And if you look closely, you can kind of see where the traces from it run to.
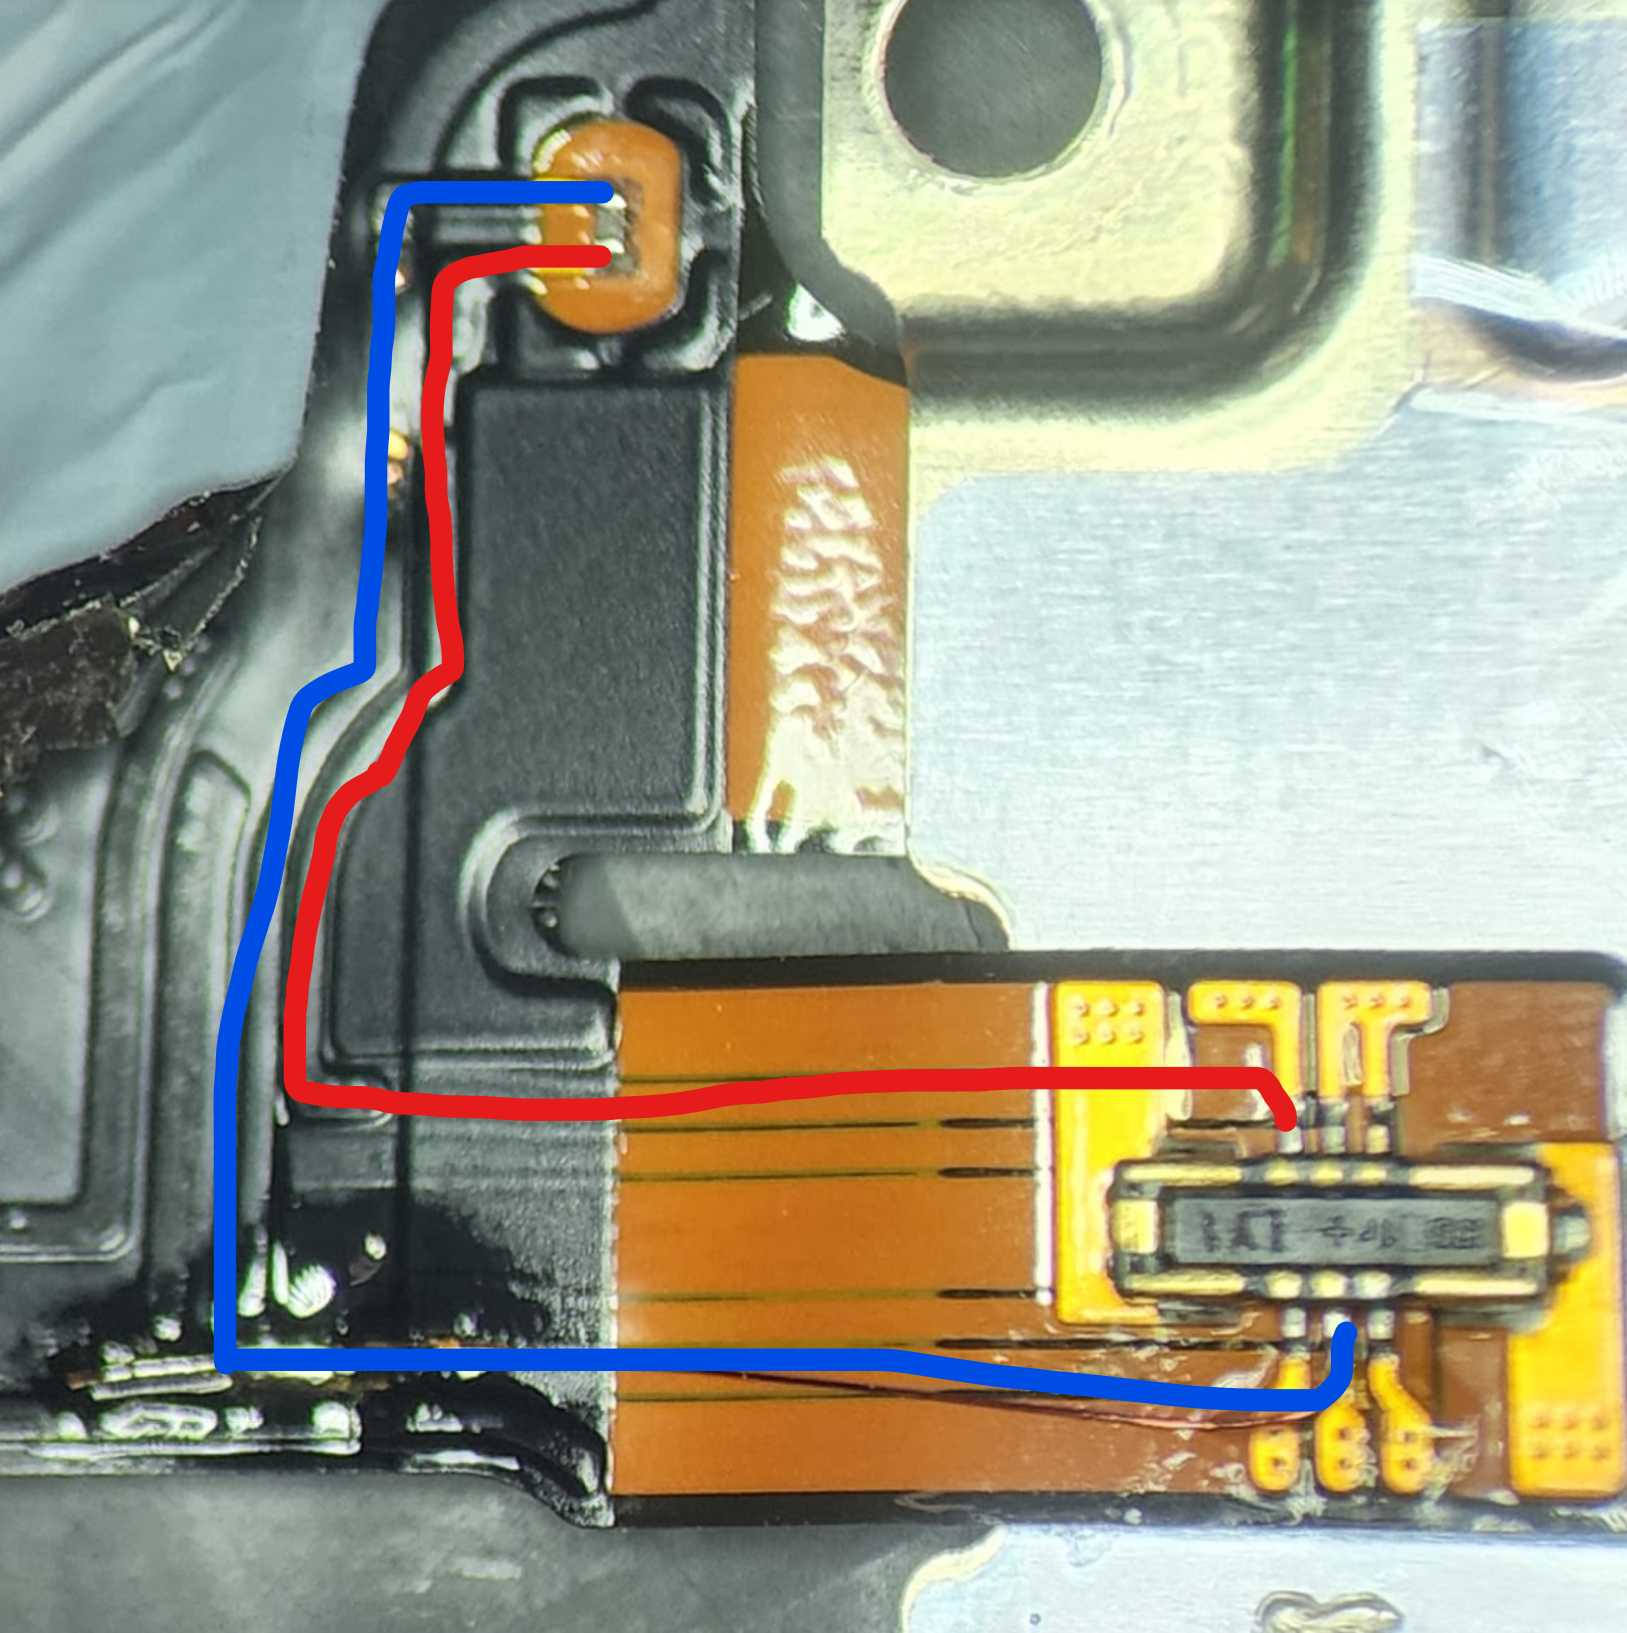
So using continuity mode, I checked for continuity from the FPC to the thermistor. I found 1 pin (red in the pic), but the other side would not get any continuity from any pin.
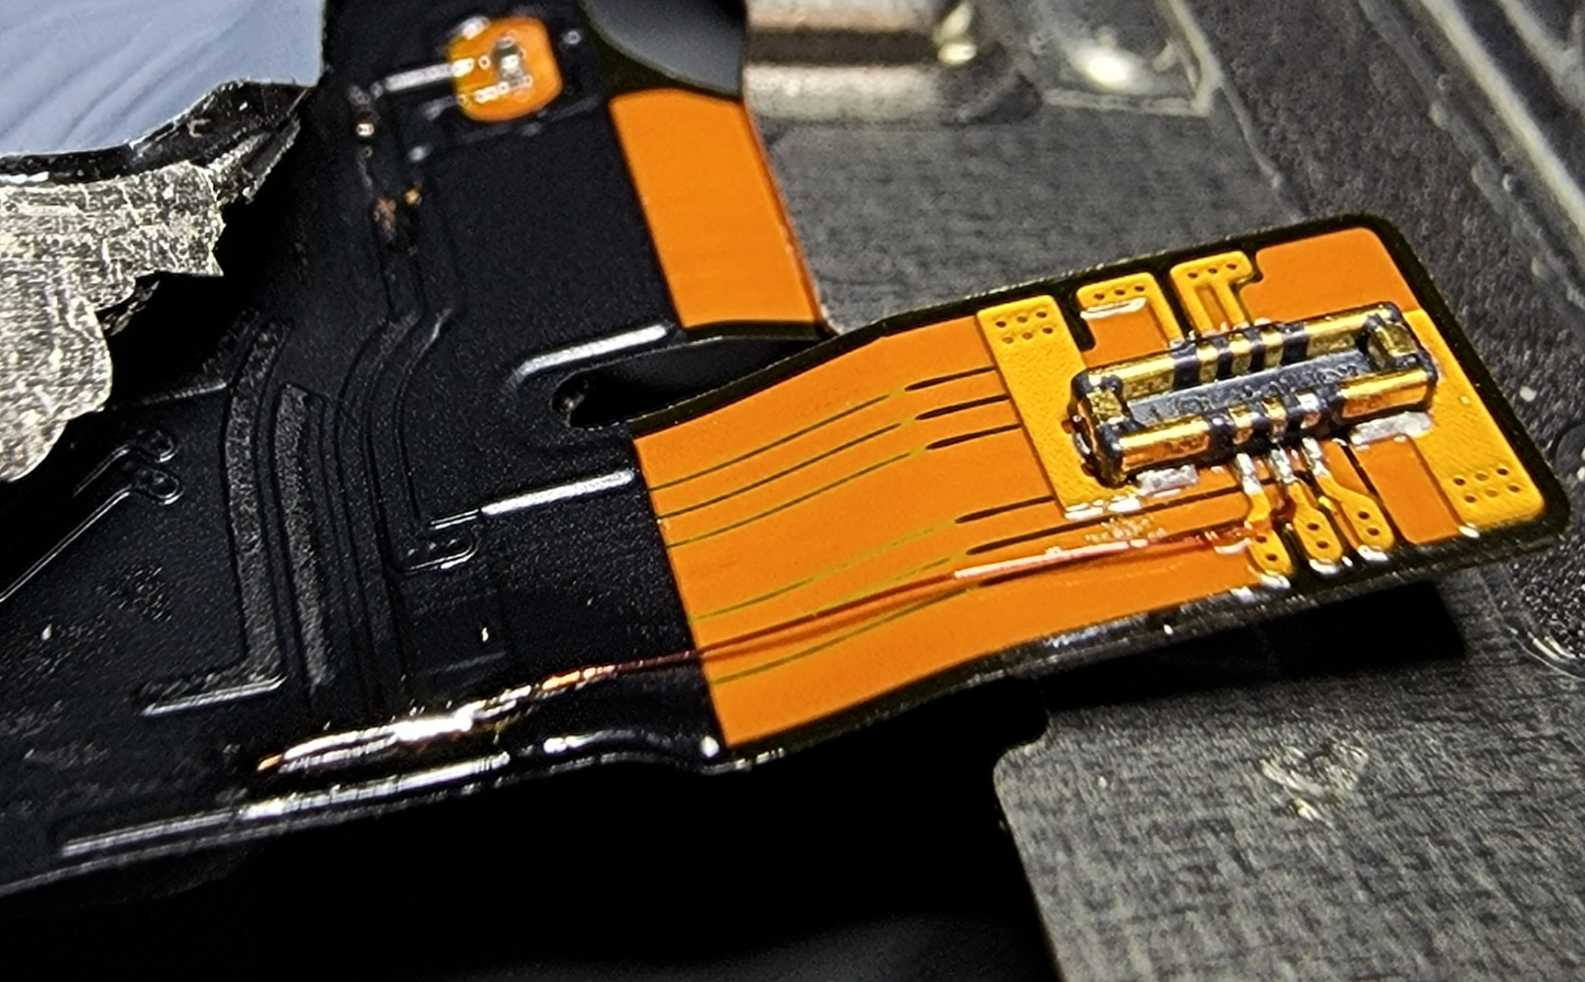
Since the traces are mostly visible, I scratched off the top layer to expose the copper trace & started probing around.
Take a look at the 5th pic. I first did blue to blue, then red to red, then orange to orange. When I got to green to green, I noticed I would sometimes get continuity when pressing down & the cable moving around.
This told me there must be a broken line somewhere between the 2 dots.
I ran a jumper from where the broken line was detected, green dot to green dot. From there, I was able to get continuity from the thermistor to the FPC from both sides of the component.
Plug it back into the phone & the phone started charging properly!
Sure, I could have just bought a new wireless coil & that would have solved it, but where's the fun in that? lol
Make sure to like this post if you found this helpful!
If you have a Seek Thermal Cam, you're missing out if you don't have a VCC Seek Stand: https://www.vccboardrepairs.com/buy-seek-stand
Injured Gadgets just got these back in stock, so get them while you can!
It can take us a while to build these out sometimes, so they're sometimes out of stock for a while, but we're working towards always having inventory ready to build more as they sell out.
This stand makes using a thermal cam so easy. So much better than any other thermal solution on the market.
It allows you to get real close up (using my Macro Lens), and easily find where the short is coming from.
Plus it's hard free, so you can have your hands free to try to boot the device from DCPS, while having an image that is in focus & not moving around.
You can even record a video through the app, while you inject voltage into the short, so you can go back & see exactly which component was it that was heating up.
Save yourself lots of time by getting a Seek Cam, Stand & Macro Lens! ...
Anyone who is doing game console repairs, knows how many screws you need to remove to access the motherboard.
Especially the PS5, with the 5,000 screws or so.
If you don't already have an electric screwdriver, GET ONE ASAP.
🌟 Cordless Screwdriver with T9 Bit: https://amzn.to/3E5duCj
🌟Extended T9 Bit: https://amzn.to/3c4YJac
It's rechargeable through micro USB and allows you to easily swap the tips out. You can also fold it to be straight or L shape.
Let me know below if you are already using an electric screwdriver 👇👇
Hey, can I get some suggestions on what I'm missing if anything?
A customer sent me a PS4 slim (SAF 005)saying it needs the HDMI IC replaced. I measured in diode mode and readings around the IC were slightly lower than usual but not completely out of spec. In any case, when turned it on, it goes to a white light and the screen is black with some flashes at startup and then completely black again.
Here's what I did:
Replaced HDMI IC: now it's permanently black, no flashes. Also the measurements are nominal.
Replaced port. Even tho it seemed good and all the pins were solid I replaced it to see if it symptoms would change. Nothing changed.
All the diodes measure ok. All the voltages are present. 2.5v on the caps on the chip side. 3.3v on the small diodes and 5v on the other diode.
The fuse that goes bad is fine as well.
I'm posting here as a last resort before I ship it back as a no fix.
Edit: the HDMI Chokes measured good as well
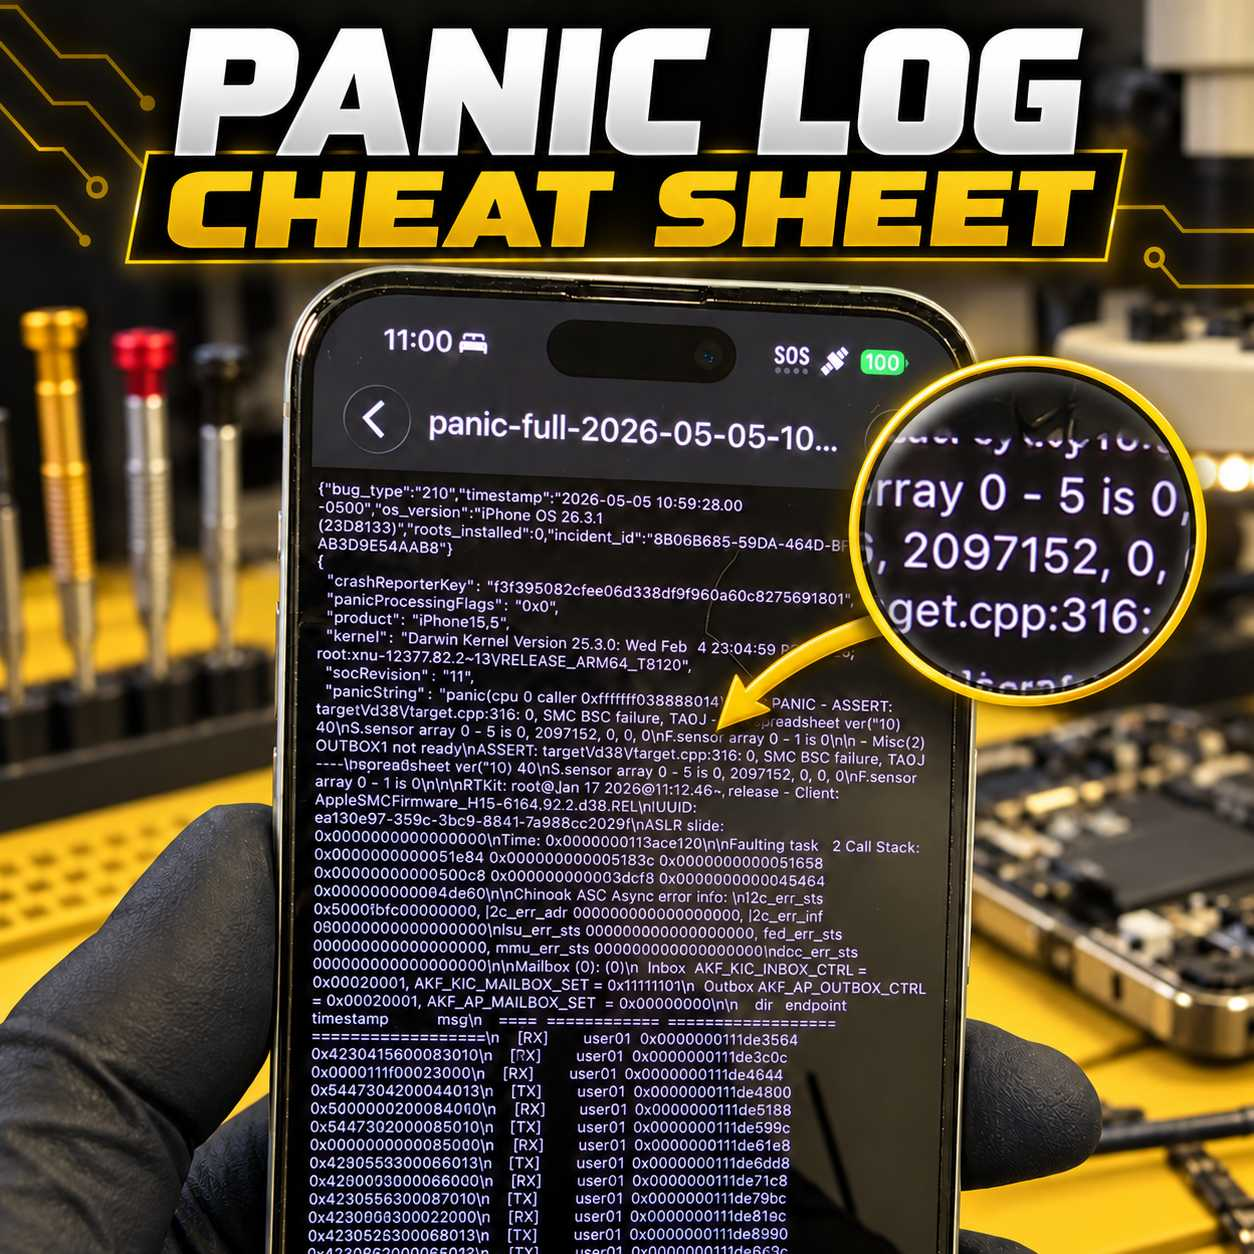
Stop Guessing at iPhone Panic Logs
Panic logs can provide valuable information about why an iPhone is restarting, but identifying the actual cause is not always straightforward.
A panic log may point toward a charging-port assembly, proximity sensor, power circuit, missing sensor, damaged flex cable, or a board-level issue. The difficult part is knowing which component is responsible on each particular iPhone model.
That is why I created the VCC Panic Log Cheat Sheet.
Personally Tested and Verified Solutions
This is not a generic list copied from forums or collected from unverified posts.
The cheat sheet is based on panic logs and solutions I have personally tested and verified while repairing iPhones at VCC Board Repairs. It covers virtually every iPhone model and documents the parts, sensors, flex cables, and circuits commonly associated with specific panic strings and numerical values.
The goal is simple: help repair technicians diagnose restart issues faster and avoid wasting time or money replacing the wrong parts.
...